September 26, 2009

Mega Man Battle Network 6 Cybeast Gregar

Introduction

Welcome to my guide of the game. Note that this is for the US version. This
guide should be very useful. So, find many answers as you can. Especially when
reading the FAQ section. (Use Ctrl+F to get there)

Let's review some stuff to refresh your memory. In EXE 6, new features have
been added. It's best to read them if you don't know them.

-----------------
| Game Controls |
-----------------

Learn the basics.

~ Main Controls ~

Control Pad (+) - Walk/move around, Scroll
A Button - Talk to people, Examine, Confirm an option
B Button - Run (hold down), Cancel an option
L Button - Talk to Megaman (Real World), Talk to Lan (Internet), Scroll up
R Button - Jack In/Out , Scroll down
Start - Access the PET Screen
Select - Set regular chip, skip cutscene

~ In-Battle Controls ~

Control Pad (+) - Select chips from custom screen, Move around battlefield
Control Pad Up - Cross Select (available later in the game)
A Button - Select battle chip on custom screen, Use battle chip
B Button - Shoot megabuster, chargeshot (hold down)
L Button - Flee from battle, View custom screen when custom gauge is full
R Button - Displays description of battle chip, View custom screen when custom
gauge is full
Start - Jump to "OK" button on custom screen, Pause battle
Select - Not used

~ Navi Customizer Controls ~

Control Pad (+) - Cursor
A Button - Use program, Install program on memory map
B Button - Back, Cancel NaviCust
Start - Jump to "RUN!" option
Select - Remove all installed programs

------------------------
| Folder Editing Rules |
------------------------

When, building a folder, you must have 30 chips. However, you can only put a
certain number of chips of the same name, depending on the data size value, in
a folder at one time:

---------------------------
| Data Size | Max Chips |
---------------------------
0-19 MB 5
20-29 MB 4
30-39 MB 3
40-49 MB 2
50-99 MB 1

Like always, you can only put up to five megachips and one gigachip in each
folder.

-----------------
| Regular Chips |
-----------------

Like the previous EXE games, regular chips always appear in the chip select on
the custom screen. They can be very useful for a strategy. In the folder, move
the cursor over the chip you want to designate as a regular chip and press
Select. If a green border appears around the chip, that means it has been
designated as a regular chip. Note that not every chip can be designated.

If the chip's data size is larger than the amount of remaining regular memory,
you won't be able to designate the chip as a regular chip. You can increase the
amount of regular memory by gathering Regular UP (RegUP) from BMDs.

-------------
| Tag Chips |
-------------

This is new in EXE 6. Tagging chips lets you select two chips to always appear
in your chip select on the custom screen. What that basically means is when
one of the chips you tagged appears on the custom screen, the next tag chip
will always appear next to it. Very useful for combos.

To tag chips, highlight a chip and press Select to designate it as a tag chip,
then select the second chip and press Select again. The combined memory of
the two chips cannot exceed 60MB.

----------------------------
| Battle Chip/Area Removal |
----------------------------

Knowing Crapcom, er Capcom, they like to screw up the EXE games. Certain battle
chips and internet areas have been removed from the US version. Lame Capcom...

~ Removed battle chips: ~
-------------------------
- Django1, 2, 3 D: Django rides his motorcycle across the row, then slices the
enemy on that row.
- Hakushaku, EX, SP H: "The Count" summons bloody lances and a rain of blood.
- GunDelSolEX G: If you used this chip in EXE 4 and 5, you're quite familar
with this...
- Otenko O: Same as above.
- DoubleBeast W: Gregar and Falzar Beast Out attack together. Why the hell did
they remove this chip??? I'd say it'd belong in the same
category as the tribute PAs.
- Gregar and Falzar X: The actual Cybeast attacks. Giga-class chip. Blame CoA
for its removal.

~ Removed Internet Areas: ~
---------------------------
- Undernet3 - Graveyard Area 1 - Immortal Area

~ Other Features ~
------------------
- The map feature (WHY?! There is no reason to remove that!)
- Boktai Sidequest (This is got to be the best Django sidequest, and yet they
remove it...
- CrossOver mini-game
- Beast Link Gate

Want to know more about other games? Click Here!

Mega Man Battle Network 6 Cybeast Falzar

Introduction

Welcome to my guide of the game. Note that this is for the US version. This
guide should be very useful. So, find many answers as you can. Especially when
reading the FAQ section. (Use Ctrl+F to get there)

Let's review some stuff to refresh your memory. In EXE 6, new features have
been added. It's best to read them if you don't know them.

-----------------
| Game Controls |
-----------------

Learn the basics.

~ Main Controls ~

Control Pad (+) - Walk/move around, Scroll
A Button - Talk to people, Examine, Confirm an option
B Button - Run (hold down), Cancel an option
L Button - Talk to Megaman (Real World), Talk to Lan (Internet), Scroll up
R Button - Jack In/Out , Scroll down
Start - Access the PET Screen
Select - Set regular chip, skip cutscene

~ In-Battle Controls ~

Control Pad (+) - Select chips from custom screen, Move around battlefield
Control Pad Up - Cross Select (available later in the game)
A Button - Select battle chip on custom screen, Use battle chip
B Button - Shoot megabuster, chargeshot (hold down)
L Button - Flee from battle, View custom screen when custom gauge is full
R Button - Displays description of battle chip, View custom screen when custom
gauge is full
Start - Jump to "OK" button on custom screen, Pause battle
Select - Not used

~ Navi Customizer Controls ~

Control Pad (+) - Cursor
A Button - Use program, Install program on memory map
B Button - Back, Cancel NaviCust
Start - Jump to "RUN!" option
Select - Remove all installed programs

------------------------
| Folder Editing Rules |
------------------------

When, building a folder, you must have 30 chips. However, you can only put a
certain number of chips of the same name, depending on the data size value, in
a folder at one time:

---------------------------
| Data Size | Max Chips |
---------------------------
0-19 MB 5
20-29 MB 4
30-39 MB 3
40-49 MB 2
50-99 MB 1

Like always, you can only put up to five megachips and one gigachip in each
folder.

-----------------
| Regular Chips |
-----------------

Like the previous EXE games, regular chips always appear in the chip select on
the custom screen. They can be very useful for a strategy. In the folder, move
the cursor over the chip you want to designate as a regular chip and press
Select. If a green border appears around the chip, that means it has been
designated as a regular chip. Note that not every chip can be designated.

If the chip's data size is larger than the amount of remaining regular memory,
you won't be able to designate the chip as a regular chip. You can increase the
amount of regular memory by gathering Regular UP (RegUP) from BMDs.

-------------
| Tag Chips |
-------------

This is new in EXE 6. Tagging chips lets you select two chips to always appear
in your chip select on the custom screen. What that basically means is when
one of the chips you tagged appears on the custom screen, the next tag chip
will always appear next to it. Very useful for combos.

To tag chips, highlight a chip and press Select to designate it as a tag chip,
then select the second chip and press Select again. The combined memory of
the two chips cannot exceed 60MB.

----------------------------
| Battle Chip/Area Removal |
----------------------------

Knowing Crapcom, er Capcom, they like to screw up the EXE games. Certain battle
chips and internet areas have been removed from the US version. Lame Capcom...

~ Removed battle chips: ~
-------------------------
- Django1, 2, 3 D: Django rides his motorcycle across the row, then slices the
enemy on that row.
- Hakushaku, EX, SP H: "The Count" summons bloody lances and a rain of blood.
- GunDelSolEX G: If you used this chip in EXE 4 and 5, you're quite familar
with this...
- Otenko O: Same as above.
- DoubleBeast W: Gregar and Falzar Beast Out attack together. Why the hell did
they remove this chip??? I'd say it'd belong in the same
category as the tribute PAs.
- Gregar and Falzar X: The actual Cybeast attacks. Giga-class chip. Blame CoA
for its removal.

~ Removed Internet Areas: ~
---------------------------
- Undernet3 - Graveyard Area 1 - Immortal Area

~ Other Features ~
------------------
- The map feature (WHY?! There is no reason to remove that!)
- Boktai Sidequest (This is got to be the best Django sidequest, and yet they
remove it...
- CrossOver mini-game
- Beast Link Gate

Want to know more about other games? Click Here!

Digimon World DS (NDS)

I N T R O D U C T I O N

Digimon Story (known as Digimon Story in most parts, Digimon World DS in the
US) is a really good adventure. However, it's also a difficult one, and with so
much to customise, it can be difficult to decide how to tackle the next
objective. That's where this guide helps.

Hopefully, this guide will be of use for helping players get through the game,
whether they're playing it now or when the game is released in Europe later in
2007.

P L A Y E R ' S G U I D E

\\\-----------------///
2.1: DIGIVOLUTION
///-----------------\\\

Digivolution is, simply put, the process of one Digimon becoming another
Digimon of a higher level. In Digimon Story, Digivolution is achieved by
meeting certain requirements. All Digivolutions have a requirement that the
Digimon must be at or above a certain Level to Digivolve, and many require the
Digimon to have a certain amount of EXP of a certain type. Others have more
unique conditions, such as having a certain Item, having a certain level of
Stress or Friendship or having played the game for a certain number of hours.
The requirements for a Digivolution to happen are explained for each individual
Digivolution, so there's no need to worry about it too much.

There are also some Digimon whom your Digimon can only Digivolve to if you have
"befriended" the Digimon. This means that you must, at some point, have either
had the Digimon itself or had 100% Scan Data for it. Other than with two
exceptions (Beelzemon and Calumon), the only way to do this is by Egg Matching
or by using a special input code.

The advantages of Digivolution are many. A Digimon will, upon Digivolving,
usually get a boost in all Parameters, and on its first time getting to the
level, an Aptitude boost, as well. It gets new traits, sometimes new
Techniques, and, of course, a new appearance.

\\\-----------------///
2.2: DEGENERATION
///-----------------\\\

New to Digimon Story is "Degeneration", which is, effectively, the opposite of
Digivolution. When you reach a certain point in the game, you can "Degenerate"
your Digimon to previous forms at will via the Digivolution menu.

Now, you may be wondering what the point of doing this is. Well, there are a
number of advantages. First, your Digimon's Aptitude will rise when it
Degenerates to a previous form, increasing the maximum Level which it can reach
(up to a maximum of 99). Second, it will have improved Parameters over the
Parameters of a new Digimon of the form it Degenerates to. Say, if you have a
Greymon and you Degenerate him to Koromon, the Koromon resulting from the
Degeneration from Greymon will be a better Digimon than one freshly scanned at
100% Scan Data. Third, it will enable you to use the traits gained from certain
forms for other Digivolution lines, and also makes it an option to change
Digivolution lines. So for instance, if you Degenerate a MachGaogamon to
Tsunomon, you can raise Tsunomon into a MetalGarurumon with MachGaogamon's
inherited traits.

Degeneration can also make some otherwise impossible Digivolutions available.
So, let's say you have a Tsunomon which you want to Digivolve to Dracmon.
Dracmon, aside from requiring 700+ DAR EXP, requires a minimum Level of 12.
Tsunomon starts off with an Aptitude level of 10, meaning that he can only
reach Level 10 without having to Digivolve. However, if he Digivolves to Gaomon
or Gabumon and Degenerates back to Tsunomon, he gains 2 Aptitude points. This
means that he can now easily reach Level 12 and Digivolve to Dracmon, plus it
will have the advantages of the traits and inherited Parameter boosts gained
from being Gaomon or Gabumon.

This may sound confusing, but read it through and you'll soon get the idea.

The number of Aptitude Points gained depends on how many phases your Digimon
Degenerates through, as detailed here...

PHASES APTITUDE POINTS

One +2
Two +5
Three +10
Four +20

START PHASE RESULT PHASE APTITUDE POINTS

Child Baby +2
Adult Child +2
Adult Baby +5
Perfect Adult +2
Perfect Child +5
Perfect Baby +10
Ultimate Perfect +2
Ultimate Adult +5
Ultimate Child +10
Ultimate Baby +20

\\\------------///
2.3: BATTLES
///------------\\\

The battle system in Digimon Story is fairly simple, but effective.

The battlefield is depicted with five "Zones", which, for simplicity, are
referred to in the Walkthrough as Zone 1 (left), Zone 2 (middle-left), Zone 3
(central), Zone 4 (middle-right) and Zone 5 (right). Except for a select few
bosses, each Digimon occupies one Zone.

When an attacking Technique is used, it fires at the designated Zone or Zones.
Some Techniques only strike one Zone (Charge, Frothy Spit) while others target
two or more (Straight Punch, Giga Blaster). Some have a fixed range and attack
certain Zones (Wall Of Ice, Darkness Zone), and some can strike multiple times
for the same Zone or even for different Zones (Harpoon Torpedo, Giga Cannon).
There are even Techniques which can strike all Zones (Terra Force is one).
Positioning Digimon strategically in the battlefield can help you to avoid
Techniques by moving them closer together or making spaces. However, it is
vital to take another element to mind, which brings us on to the following bit.

Another element to battles is support abilities. When a Digimon is right next
to another, it will be supported by the Digimon next to it. This means that the
support ability of the Digimon next to it will give a boost to one of the
Digimon's Parameters or other statistics. You can check your Digimon's support
ability by checking its traits.

Want to know more about other games? Click Here!
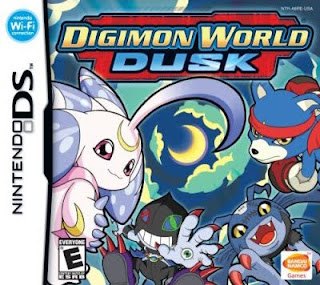
Digimon World: Dusk (NDS)

Okay, this is a guide for doing the quests, not how to get Digimon. This
won't tell you what digimon digivolves into what. It will contain Shop
stuff (like what you buy at what store). If you want a list of of Digimon,
then go here: http://www.gamefaqs.com/portable/ds/file/937344/49842.
Anyway, let's get started. Click on New game, and choose whether you want
a boy or girl. Next,enter your name. Next choose the pack of Digimon you
want, they all have Lunamon. Here are the packs and the Digimon they have:

Balance Pack: A well-balanced pack. It lets you get Clockmon Digimon more
quickly: MegaGaogamon, Lunamon, and Clockmon

Attack Pack: This pack raises attack quickly. It lets you get SkullGreymon
Digimon more quickly: SkullGreymon, Lunamon, and WarGarurumon.

Defence Pack: This pack raises defence quickly. It lets you get Kurisarimon
Digimon more quickly: MegaKabuterimon, Lunamon, and Kurisarimon.

Pretty Pack: A pack with a set of pretty Digimon. It lets you get Pandamon
Digimon more quickly: Pandamon, Lunamon, and Lillymon.

For my first game, I chose Attack Pack. This time around I'm using Balance

==============
DarkMoonCity
==============
DarkMoonCity is the main city for Digimon World Dusk. You can check what
area you are in by pressing X and looking at the top screen. There are
5 different areas to DarkMoonCity all of them start with the dark >.>
The areas are: Dark Office (where the quest area and the entrance to
the Union Room is), Dark Gate (where the exit and entrance to DarkMoonCity is),
Dark Hall, Dark Square, Dark Plaza (where the entrance to your house,
and the shop is).

==============
Stuff you need to know
==============


Main Menu:
When you open it up, on the top menu it shows your party, your relief
Digimon,
your bits, and your location.

DigiFarm: On the top menu is the list of your farms. On the bottom screen you
can see the farm status of each individual farm. Digimon List, you can
see all the Digimon you currently have. Farm Goods, you can see how what
farm goods you have.

Digimon: From here you can check on the Digimon you have and Digivolve
them.You can also switch them around, and switch them with your reserves.
You are allowed to have only 3 digimon out in battle at a time.
Click on a Digimon and it takes you to another menu.
Here on the top menu you see what personality your digimon has,
it's type, how many traits it has, it's strong attribute, it's weakness,
and it's friendship. On the bottom menu you see your digimons stats.
Also, you can choose from one of five menus:
Techniques (the moves it knows and it's Sp. Tech.)
Equip (where you can equip different items)
Traits (stuff that beefs it up in battle)
Digivolve Route (it's where you digivolve your digimon)
and S.Exp (short for Species Experience Points, more about it below


This for the 79 characters-----------------------------------------------------

Items: The items you have, excluding Equipment. The items heal your hp,
mp, or a gate disk which returns you back to DarkMoonCity.

Quests: This shows what quest you are currently on, your Quest Completion
rate, and your Tamer Points. Once you receive enough tamer points you can
talk to someone and they'll give you a gift, usually it's just a large sum
of Bits.

Tamer Info: Here you can check stuff about your accomplishments, like under
the first menu, Digimon Completion, Quest Completion, Digimon Defeated,
Most damage done, Top Digimon Level, and Number of Friends. Under DigiEgg
Gallery it shows you what Digieggs of you have (no, not the DigiEggs that
armor digivolve, those you have under Key Items in the Items menu), and in
the third menu you have the Digimon Gallery.

Save: Saves your game.

Battle Menu:

Fight: Choose an attack to use to either; damage opponent, lower opponents
stats, lower opponents resistance, increase your own resistance, heal your
hp, heal your MP, or increase your own stats.

Move: You can move your digimon around to use there abilities, or switch in
your reserves (if your digimon are weak to a certain type).

Item: Use items to heal your Digimons Hp, Mp, or their status infliction.

Defend: Decrease the damage you take. Personally, I never use it except to
save MP.

Flee: Put your tails between your legs and run away. Doesn't always work
though.

Attack Types: There are 6 different types of attacks, Fire, Holy, Dark,
Steel, Wind, and Water. Each type of Digimon has a primary type (what is
ineffective against it) and a type it's weak against. Like most Dark
Digimon are weak against Holy, and most Holy are weak against Dark type
attacks.

Digivolving:
Species Experience: This is experience that lvls up your digimon. All
digimon can take any kind of Species Experience, but to Digivolve, a digimon
can require a certain amount of Species Experience, i.e. Seriphimon
requires 77777 holy points.

Friendship: Some Digimon require a certain amount of Friendship percent to
digivolve, some only need 50%, some need 70, others may even require 100%.
Not all Digimon require friendship to digivolve, and it's really easy to
gain, and hard to lose (so far, I think the only way to lose it is if you
lose a battle). To check your points, open of the menu with X, click on
Digimon, and highlight whatever Digimon, and on the Top Screen there will
be 3 hearts. Filling one heart gives you 33.3 percent.

Other Methods to Digivolve: The other ways to Digivolve are just simply
level up your digimon, or in some rare cases you need to have certain
digimon in your Digimon List.

Shops: In Digimon World, you use a currency called Bits.

Want to know more about other games? Click Here!

September 24, 2009

Dragon Ball Z: The Legacy of Goku II: Missing Namek/Golden Capsule Guide

Missing Namek Locations
-----------------------

The missing Nameks are scattered all over the World. Here are the locations:

1.) Go to the Northern Wastelands and check your Scouter. There is a Lv. 30
Goku Character Gate. Open the gate and throw the switch. This creates a
bridge to cross the gap so you can access the Namek.

2.) In the Northern Mountains, Piccolo has a Lv. 30 Character Gate. Behind it
is a missing Namek. (Thanks to Bobbe from the Gamefaqs message board for
that one)

3.) On the 4th floor of Appartment B in West City.

4.) Go to the Mayor's house in West City. You'll find him walking around in
the Kitchen. (why is he in the Kitchen if Nameks don't eat? They only
drink WATER. lol)

5.) Near the end of the Tropical Islands, there is a Lv. 35 Vegeta Character
Gate. Before going through the Gate, continue to the (E). There is the
Namek.

6.) Go to the forest (S) of Goku's House in East District 439. There is a
Lv. 30 Vegeta Character Gate. The Namek is in the (NE) part of the area
in a secret area. If you have the upgraded Scouter, it will be a big gray
square. Go to the area right beneath it (looks like a pot-handle) and
near the end, walk into the trees.

7.) On the (NW) corner of Kami's/Dende's Lookout.


------------------------
Golden Capsule Locations
------------------------

These are in no particular order. They are written down as I come across
them.

Shorthand for Golden Capsule will be denoted as G.C. for this list.

West City - 5
Warlord's Domain - 2
Triceratops Jungle - 2
Southern Continent - 3
Northern Mountains - 6
Outside Gingertown - 2
Gingertown - 1
Tropical Islands - 1
East District 439 - 2
Master Roshi's Island - 1

1.) West City

Talk to Hercule as soon as you arrive in West City. He'll give you an
Autograph. Now head (N) in that same screen and talk to the kid walking
around in the Park. He'll give you a G.C.

2.) West City

From the Park, head (W) one screen. Hook (N) and (E) to find the next
G.C.

3.) West City

(NE) corner of West City, enter the West City Highway. There is a Save
point to the (N), go (E) to find the G.C.

4.) Triceratops Jungle

After passing through the Piccolo Gate at the beginning and going to the
next screen, head (S). Head (W) from here and the G.C. is in the (SW)
corner.

5.) Triceratops Jungle

After getting G.C. #4, head back 2 screens and head (E) over the bridge.
Go (S). Make your way (SE) and cross the rock bridge. Take the (S) exit
out of this screen and cross over the Lilly pads. All the way to the (E)
is the G.C.

6.) Warlord's Domain

Head through the metal door and exit out of that screen to the (W). In
the (SW) corner of this screen is a G.C.

7.) Warlord's Domain

From where you get G.C. #6, head (W). Take the (N) exit from here and
go around the old Warlord's fort to the (E). On the (W) side of the
building is a kidnapped guy. He gives you a G.C. for rescuing him.

8.) West City - Mayor's House

In the right side of the house, you'll find the G.C.

9.) Southern Continent

In the screen that leads you to the fight with 19/20, go (W) and follow
it to the end. The G.C. is there...beware the 2 Tiger Bandits, they
like to hid right up against the (S) cliff.

10.) Southern Continent

Gohan has a Lv. 15 Character Gate in the (SE) part of the area. Work
your way towards the center of the area, and you'll find a T-Rex
guarding the G.C. The T-Rex has 1750 HP.

11.) Southern Continent

From the entrance, go (W) one screen.

12.) Northern Mountains

(N) of the Save point just as you enter, Gohan has a Lv. 25 Character
Gate. You can see the G.C. from the Gate.

13.) Northern Mountains

(S) of the Save point just as you enter is a G.C. It is surrounded by
about 6 Warthogs

14.) Northern Mountains

From where the funny music starts (from Vinnie's) head (W). Make your
way till it ends to find the G.C.

15.) Northern Mountains

From the barrier guarding Dr. Gero's lab, head (E). Make your way all
the way (E) and head (N). If you exit (N) from this screen, you'll find
the Generator with the eggs you have to carry...don't go (N). Go (S),
down the ramp where the Tiger Bandit is walking up and down to get your
G.C.

16.) Northern Mountains

From the barrier, head 3 screens to the (E) and take the (N) exit. Right
there in front of you, can't miss it.

17.) Northern Mountains

From the barrier, head (W) 2 screens. Here, you fight Dr. Gero. Beat him
and head to the (S) end of THIS screen to find the G.C.

18.) Outside Gingertown

In the screen where you find the time machine, check the (SE) corner for
the G.C.

19.) Outside Gingertown

In the western part of the area, you'll find a pond with a guy fishing.
He forgot his bait in West City, and you need to get it. From the World
Map in West City, head (S) one screen and (E) one. Enter the middle
house. Now return to the guy and get your G.C.

20.) Gingertown

Go through Piccolo's Lv. 30 Character Gate and into the next screen.
Go between the buildings to the left and head (N) to find the G.C.

21.) Tropical Islands

When you get towards the end of the 4th island, look in the (SW) corner
for the G.C.

22.) West City

First you need the key. In the Tropical Islands, go to the end of
the end of the 4th island where Vegeta's Gate is. Continue (E) and talk
to the man walking around. Apartment A is in West City. In the (SE) part
of town. You'll find the G.C. there.

23.) East District 439

In the Forest (S) of Goku's House, go through Vegeta's Lv. 30 Gate. Head
(W) all the way and there is a G.C. in the room with the Save point.

24.) East District 439

While still in the area through Vegeta's Gate. In the first screen, head
(N) up the (E) side of the screen. There is a jut of land sticking out
into the small lake. The G.C. is there.

25.) Master Roshi's Island

On the (NE) corner of the island.

Now that you have all 25, go see Dr. Briefs. He lets you keep one. When used
through the Item window, it takes you back to the World Map if you're staning
OUTSIDE. It won't work inside buildings/caves.

Want to know more about other games? Click Here!